上一篇介紹了 Nest.js 專案的基本架構,這次將針對 Controller 來特別介紹。
Controller 擁有基本路由設定,主要負責接收 client 端的 requests 以及 response。
我們來看看以下範例,將會在 /src/app.controller.ts 做示範:
Get
在 terminal 輸入 yarn start:dev 後,到 Postman 用 Get 請求就會接收到 test。

我們也可以在 Get 請求帶入參數,如下:
如下圖可以看到成功回傳輸入的參數

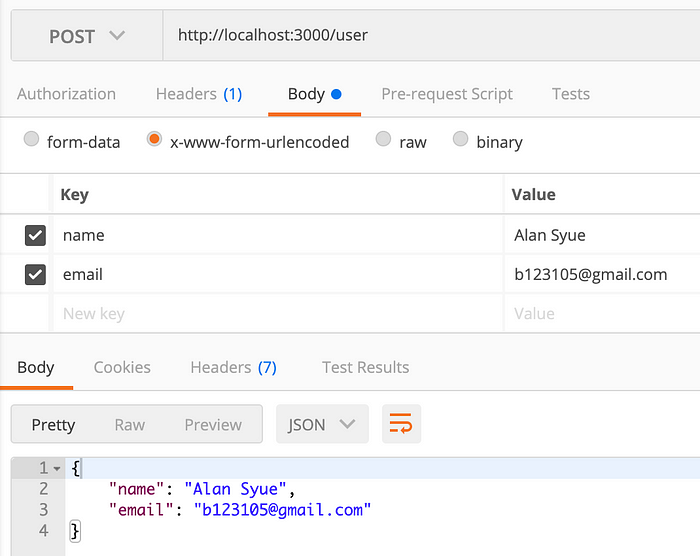
Post
接下來介紹 Post 請求用法,如下範例程式碼:
到 Postman 測試,成功回傳 name 跟 email。
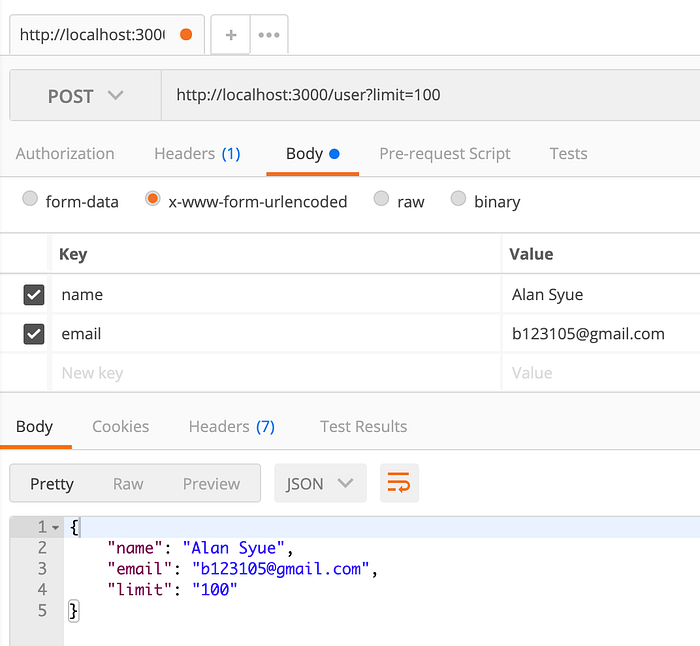
另外也可以操作 query string,如下範例:
結果如下:
小結
這次先介紹 Controller 中常用到的 Get、Post 請求,之後系列會有實作 CRUD,到時候可以再延伸介紹 Put、Delete。如果以上內容有錯誤,再請不吝指教!